Difference between revisions of "Pictures"
Jump to navigation
Jump to search
(Added notes about transceiver mounting.) |
|||
| Line 1: | Line 1: | ||
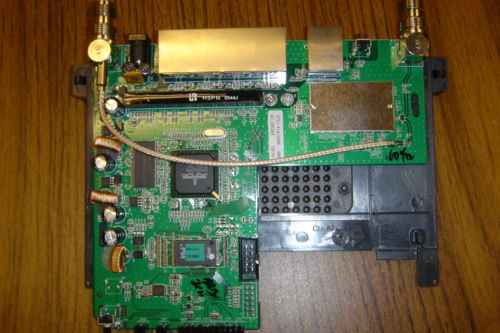
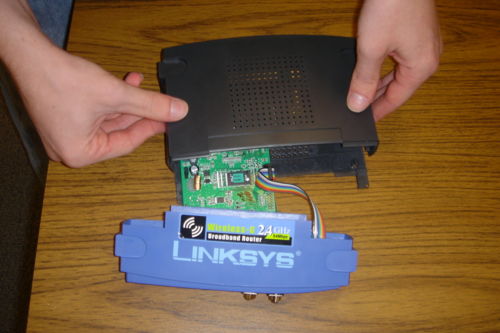
[[Image:mainboard.jpg|thumb|500px|center|This is what the inside of the WRT54GL looks like. The back of the router is the top of the image. Our serial port is in the front portion on the right hand side above the empty header.]] | [[Image:mainboard.jpg|thumb|500px|center|This is what the inside of the WRT54GL looks like. The back of the router is the top of the image. Our serial port is in the front portion on the right hand side above the empty header.]] | ||
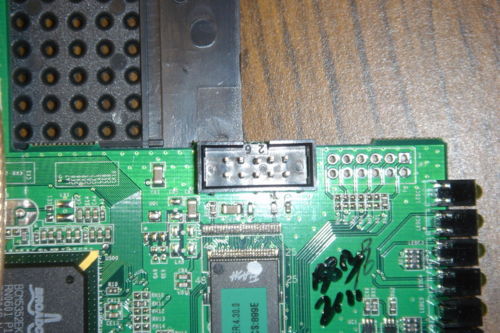
| − | [[Image:serial.jpg|thumb|500px|center|A closer view of the serial port header.]] | + | [[Image:serial.jpg|thumb|500px|center|A closer view of the serial port header we have added. Our header is keyed to prevent plugging the ribbon cable in backwards.]] |
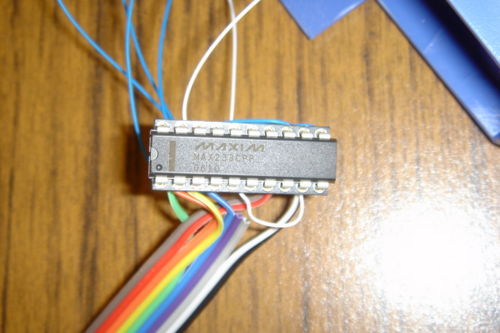
| − | [[Image:maxim.jpg|thumb|500px|center|This is a picture of the chip we used to | + | [[Image:maxim.jpg|thumb|500px|center|This is a picture of the MAX233A transceiver chip we used to convert the digital serial signal to proper RS232 voltages.]] |
| + | |||
| + | Our picture shows a wire-wrap socket to hold the | ||
| + | transceiver chip, but this was our prototype. In practice, now that the | ||
| + | correct connections have been confirmed experimentally, we will solder | ||
| + | leads directly to a 20-pin standard DIP socket, which can be glued on its | ||
| + | side to the inside of the front case piece. This allows access to the | ||
| + | receiver chip (in case an electrical mishap damages it,) while still | ||
| + | allowing easy opening and closing of the case. | ||
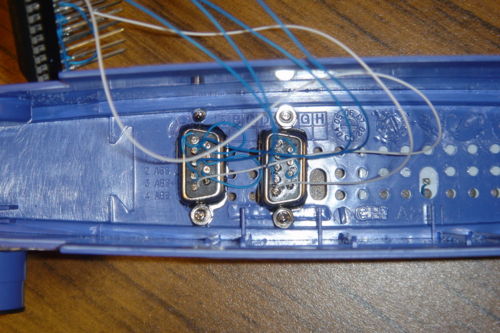
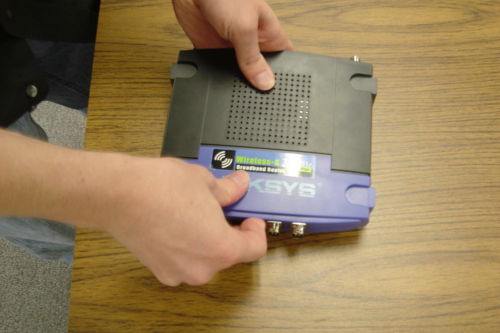
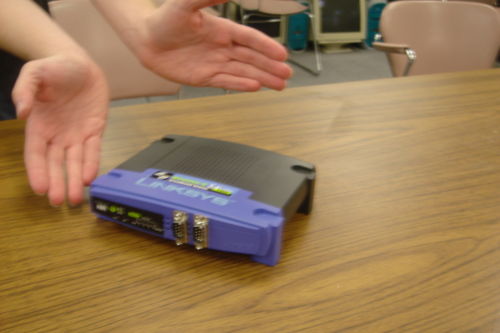
[[Image:faceplate.jpg|thumb|500px|center|This is the final version of the faceplate of our router, with the two external serial ports attached and ready to go.]] | [[Image:faceplate.jpg|thumb|500px|center|This is the final version of the faceplate of our router, with the two external serial ports attached and ready to go.]] | ||
Revision as of 18:36, 11 September 2006
Our picture shows a wire-wrap socket to hold the transceiver chip, but this was our prototype. In practice, now that the correct connections have been confirmed experimentally, we will solder leads directly to a 20-pin standard DIP socket, which can be glued on its side to the inside of the front case piece. This allows access to the receiver chip (in case an electrical mishap damages it,) while still allowing easy opening and closing of the case.
